Category: Merlot Wine
Homemade Wine Making Facts
Posted onWine is more popular than ever in the United States. There are almost 3000 vineyards in the US, with at least one winery in every state. Most US wine production occurs in the west, with the states of California, Washington and Oregon leading the way.
Here’s something you may not know. More and more people are discovering the fascinating hobby of making their own homemade wine. If you’ve ever thought about making your own wine at home, there’s no better time to start than right now. Let’s take a look at what’s involved to get started making your own wine.
First of all, you really don’t need a lot of space to get begin. All the wine I’ve made, a couple thousand bottles, has been produced in my 10 X 15 foot kitchen. And all the equipment you’ll need can be hidden away in a hall closet when it’s not in use. So for most folks space is not an issue.
Time is a factor for most people these days. Homemade wine making need not be labor intensive. When using wine making kits, the absolute easiest way to get started, the total time you’ll spend from starting a batch to carefully putting the last drop into the bottle will be approximately 4-5 hours, spread over a one month period.
Money is another factor for most folks these days. A basic wine making equipment kit will cost approximately $ 100 to $ 140 depending upon where you’re shopping. This equipment can be used over and over again, so the initial investment will eventually pay for itself.
Ingredient kits can cost $ 60 to $ 150, putting your cost per bottle in the $ 2 to $ 5 range. This is a bargain for the high quality, delicious wines that are being produced by homemade winemakers.
Wine making is a fun and fascinating hobby. You can begin with the basics and stay there, producing high-quality wines that you and your friends and family will enjoy. If you have a creative side and love to explore new things, you can take your wine making hobby as far as your creative desires will lead you.
Wine making is fun, economical, and easier to do than you think. Begin your wine making journey today!
Wine Tasting For the Novice
Posted onWhen it comes to wine appreciation, there’s so much involved. From wine flavors to aromas to tasting to educational information, it all contributes to the fun you have drinking it, right? No matter where you drink your wine-whether it be a winery, a dinner party, or your own living room-knowing how to taste your wine adds flavors and aromas you may have never enjoyed had you not tried it. If you aren’t sure how to best taste your wine, as opposed to just swig it like a beer-don’t worry, this article’s got you covered. Here’s all you need to know in order to conduct a simple wine tasting for social and your own purposes.
Color- First, when conducting a wine tasting, you want to check out the color. Aside from it being red or white, what shade is it? If it’s a white wine, it can be light yellow, light green, brown, amber, or clear. Depending on the color, you will find a quite a range of taste and aroma.
Opacity- Next, examine how clear it is- in the light. Look closely at your white or red wine to discover translucent or opaque it is dark or light, etc. Moreover, it’s always good to check for cork bits and sediment, as both of these factors will definitely affect your wine experience.
Swirl- It’s what you have all been waiting for: the classic wine swirl. Here it is. Why do people swirl their wine other than looking pretty sophisticated doing it? Because it releases more aroma, and this will take you more fluidly to your next step: smelling your wine.
Smell- Ok, so now that you have swirled your wine and released more aroma by doing so, if you want you can swirl it again-many enthusiasts do. Once you have refreshed its aroma, smell your wine by sniffing lightly over the glass.
Now, Really Smell- Now, that you got a first impression of the wine, take a deeper smell by putting your nose into the glass of wine. Inhale through your nose with your mouth closed. This is typically where a wine enthusiast will say something like, “my, doesn’t that have an oaky aroma?” or something to that effect, but you may or may not recognize an aroma if you are new to wine tasting and haven’t sniffed enough wines. What you are looking for is basically one of a few aromas: oak, vanilla, citrus, floral, or berry scents. If you don’t get it on the first try, certainly try swirling and smelling again.
Taste- Yes, it takes six steps in the average wine tasting to get to actually drink your wine, but if you are doing it properly, it should be well worth it. How do you taste it properly? Take a small sip and introduce it to your taste buds or palate. You should be able to pick up tannin amount, acidity, sugar, and alcohol content. As the wine approaches the middle of your palate, you should be able to pick up which flavors are involved. Then, once swallowed, consider the aftertaste, and how it affected your overall wine experience.
More Merlot Wine Articles
5 Common Wine Myths Debunked
Posted onDon’t let some snooty ‘wine snob’ scare you away from all the fun you can have by exploring wine. There are countless varieties of wines that you can learn about and try. It can be very relaxing to have some friends over, open up a bottle of your latest ‘find’ and sit back and enjoy the company and the wine.
Today more than ever a lot of the old ‘rules’ about wine just don’t matter. The single most important rule you need to remember is that you are supposed to enjoy your wine. It doesn’t matter how expensive it was or what you’re having for dinner. You need to enjoy the flavor of the wine you are drinking.
Here is a list of the 5 most common wine myths — debunked…
1) Good wine has to be expensive. Nope. Good wine is whatever you like the taste of even if it comes in a box!
2) You have to take out the cork to let it breathe. While it is true that many wines will benefit from adding oxygen to them, just taking out the cork won’t allow enough oxygen in the bottle to do any good. If you want your wine to breathe pour it into a wide mouth wine decanter or glass prior to serving.
3) You can’t store an open bottle in the refrigerator. As long as you put the cork back in a bottle of wine should be just fine in the refrigerator for up to 3 days.
4) You can tell if the wine is good by smelling the cork. Generally the only thing you will learn by smelling the cork is whether or not the cork is moldy. If you want to know if the wine itself is any good smell it. And then taste it.
5) You have to have white wine with fish and red with meat. This is probably one of the best known ‘wine-isms’. And it’s true, to a point. It’s all about combining the flavors of the wine with that of the food for the maximum enjoyment of both. You don’t want one flavor overpowering another, you want them to compliment each other.
It’s important to keep in mind though that just adhering to this guideline might get boring and you should never follow it if you don’t like a certain type of wine.
Let’s say you’re having a nice steak for dinner. According to the guideline you should have a white wine with dinner. But what if you don’t like white wine? Wine is all about enjoyment and relaxation. So have the type of wine you prefer no matter what you’re having for dinner.
There you have it, 5 of the most common wine myths debunked. Just enjoy your wine and your friends and family. That’s what it’s all about. Don’t get caught up in all the wine etiquette. Enjoy your wine and enjoy yourself!
Make Your Own Wine at Home
Posted onYour Supplies
The easy way to make your own wine would be to simply buy a kit to make your own wine. The prices are pretty steep but putting together your own supplies and totally doing it on your own can be a lot of fun. You will need: A few five gallon buckets to make and store the wine (some should have air locks for the fermentation process); a winepress (optional); a hydrometer to take readings of sugar and alcohol; a destemmer; a siphoning hose and some bottles, corks and a corker. Sterilize everything before you begin to make your wine.
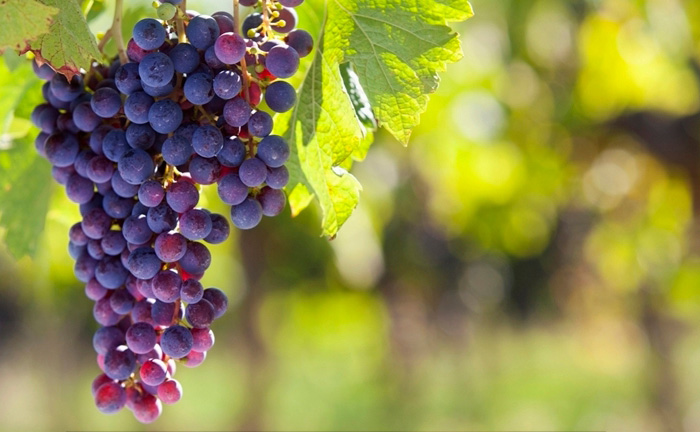
Grapes (of course!)
I normally make roughly 5-6 gallons per batch when I make wine at home. This should give you about 24 bottles of wine. You are going to need quite a lot of grapes. You will need about 45 pounds of grapes. If you want, winemaking supply stores also sell bottled grape juice just for making wine at home.
Juice Those Grapes
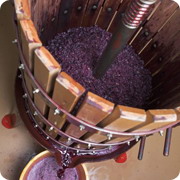
You can obviously skip the step of making grape juice if you’ve bought the bottled juice. If not get that winepress working if you have one or start squishing grapes! Please note that red wine grapes must be fermented with the skins for several days before juicing.
Prep Your Juice
So you have you juice, now take out your hydrometer and take a reading of your sugar content. Check to see if the alcohol scale reads between 9% and 13%. If you are below that level add some sugar until your hydrometer gives you the green light to continue.
Ferment
Pour the juice into an open container about halfway. Next add yeast nutrient, pectic enzyme and potassium bisulfite. Wait a day and then gently sprinkle yeast (one package every 5 gallons) into your container. Let the fermentation process begin! Bubbling will occur in about 12 hours. Make sure you stir daily and have your containers lightly covered with a clean cloth.
And Again
You are almost there after five or six days. Move your fermenting juice into a clean bucket with an air lock. The sediment from the first bucket should stay there! Be carefull. Take another hydrometer reading to let you know if you are done fermenting. Almost there. Your wine will start to separate from the sediment at this point and needs to be taken out. This can take quite a while; several weeks to maybe even months.
Bottle Your Batch
After your liquid has cleared prepare for bottling. I usually strain my wine before bottling to remove any left over sediment. This is not necessary but a good habit to have I feel. Siphon the wine into your bottles, cork them and store them in a nice cool, dry place until you want to drink. Age it as you see fit. Enjoy!!
Find More Merlot Wine Articles
How to Build a Wine Rack
Posted onWhether you are an avid wine connoisseur or a normal wine drinker, an alcohol rack will help you manage your collection easier. You can also use your wine rack to properly store your spirits so that it will not be wasted.
MATERIALS NEEDED TO MAKE A WINE RACK
The materials that you needed for your project are wood stock, one by two strapping stock, tack nails, bolts, carpentry glue, screws and nails.
TOOLS
The tools that you needed to for this endeavor are saw, drill with bits, tape measure, hammer, pen and paper.
STEPS IN BUILDING YOUR WINE RACK
One of the first things that you should know before beginning your project is where you will place it. If the standard rules regarding alcohol storage are followed, it should not be constructed near doors and window, in an area where there is a high degree of humidity and in a place where there is sunlight. One of the most well-known variations of alcohol racks are table top racks. They can be place in alcoves and in the top of cabinets.
For this rack variation, you need to use a thin wood stock. Sizes differ for this variation but it is recommended to use one inch deep and two inches wide. Determine what will be the height of your creation and create 2 pairs of legs. With the help of a stock, decide the length and width of the set-up and create the cross braces and holders needed.
For a 6 wine bottle rack, you need to create sixteen braces-twelve for the alcohol bottles and a pair of braces for the ends for additional support. Installing the braces can be accomplished in three different ways: using nails, screwing and using a drill. Carefully connect each part and make sure to place a cross brace for additional strength.
If you are making it in a wine cellar, it needs to be constructed near a power outlet. It should also be made above ground so that it will not be affected by the moisture in the ground. The main difference between a bigger rack and kitchen bottle rack is that this will be installed to the wall for additional support.
Create thick posts for it and a single two by four stock with cutouts for the wine bottles. Make clamps for the bottle support. Do this for one portion and then make it as a reference for how many wine bottles that you needed.
Featured wine
popular posts
-

Know More About Popular Wines
1-30 2023Red wines have been around for ages now. They are available in so many varieties. While some of these varieties are absolutely light and Read More
-
How To Choose Wine?
1-30 2023What is a wine? It is an alcoholic beverage, typically made of fermented grape juice. When we think of wine, we think of grapes. Read More